
 |
| Ground Out Ding with First Layer of Fiberglass |
Every summer we tackle a list of projects that bring LUX closer to where we want her to be. The good news is that we seem to be getting close to the end of seemingly endless projects. This summer, we tackled a big compression ding on the port side, replaced the saildrive bellows, replaced the vibration dampener in the engines, and installed Flexofold props.
LUX had had a 6 inch diameter compression ding amidships, port. We ignored it last year (2015) as we were upgrading the standing rigging. This year's project started with the big grinder - grinding out the gelcoat and upper layers of fiberglass and feathering it out to a 12 inch diameter area.
 |
| Epoxy Workstation on a Walk Board |
The fiberglass had delaminated from the underlying end-grain balsa. We drilled a few small holes in the fiberglass that remained. There are many opinions on whether to use epoxy or polyester resin on repairs. Our understanding is that polyester to polyester is only a mechanical bond, so we prefer epoxy, which also has adhesion. The Gougeon Brothers West Epoxy system has a lot of documentation and we’re experienced in using it, so that’s our go-to system for fiberglass repairs. We mixed some epoxy, adding cabosil (silica) to slightly thicken it, and injected it between the fiberglass and the balsa with a small plastic syringe.
 |
| Apply Pressure While the Epoxy Cures |
The remaining epoxy was thickened and used to apply concentric circle layers of chopped mat and cloth to the surface of the depression. A piece of plastic sheet covered the still wet fiberglass and a squeegee was used to squeeze out the excess epoxy and bubbles. We then pressed a piece of flat foam on top of the plastic sheeting, backed by a piece of plywood. The whole thing was held in place by a set of walk boards.
 |
| 12 inch Drywall Knife |
 |
| 24 inch Paint Shield |
The area around the ding was masked off and the surface scrubbed and sanded to remove the amine blush that the West Epoxy system creates on the surface. The plastic sheet should prevent the formation, but we needed to sand it to create a “tooth” to help bond successive layers of repair. Low density fairing compound (#407) was mixed with epoxy and applied to the sanded surface. We used a 12 inch drywall taping knife to feather out the surface.
As the surface came up to the same level as the gelcoat, we switched to a 24 inch painting shield to apply epoxy mixed with Microlight sanding filler (#410).
It took several coats of the Microlight epoxy mix to feather the repair to the same level as the gelcoat. We then used a sanding block and a 4-inch pad sander to sand it down slightly below the level of the surrounding gelcoat. The metal kedge of the 24 inch painting shield, bowed so that it followed the curvature of the hull, worked well for showing that the repair surface was slightly below the gelcoat. It helps to use some white tint in the epoxy in the final stages so that the underlying color isn't as dark.
 |
| Preval Sprayer Kit |
Time for something new: spraying gelcoat. We had heard about using the Preval disposable sprayers for small gelcoat repairs. It is definitely at the low end of the quality scale for spraying gelcoat. The gelcoat was thick, even after thinning as much as we dared. The resulting surface has an orange peel dimple to it, clearly visible in the below picture. We knew that we’d have to sand down the orange peel dimples, so we applied several coats over the course of the afternoon, making a quick trip to the local marine supply store for more Preval sprayers. Only the refill compressed tank and sprayer valve was needed. We mixed the gelcoat in a small cup and sprayed directly from the cup.
 |
| Orange Peel Stipple Pattern |
We used the finish version of gelcoat, so we didn’t have to spray an air barrier (PVA mold release) on the surface. Color matching was the difficult step. We’ve been slowly gaining experience with gelcoat color matching. The Leopards seem to use a brown tint, which we were not able to replicate using red, yellow, and black. The amount of each of these colors is simply too small to accurately get the right color. We finally found a small tube of brown color in a kit from Jamestown Distributors. A very small dimple of color paste on the end of a bamboo skewer is just about right for mixing with an ounce of white gelcoat. The Leopard interiors require a little additional color paste since they are more of an eggshell color than the topsides.
 |
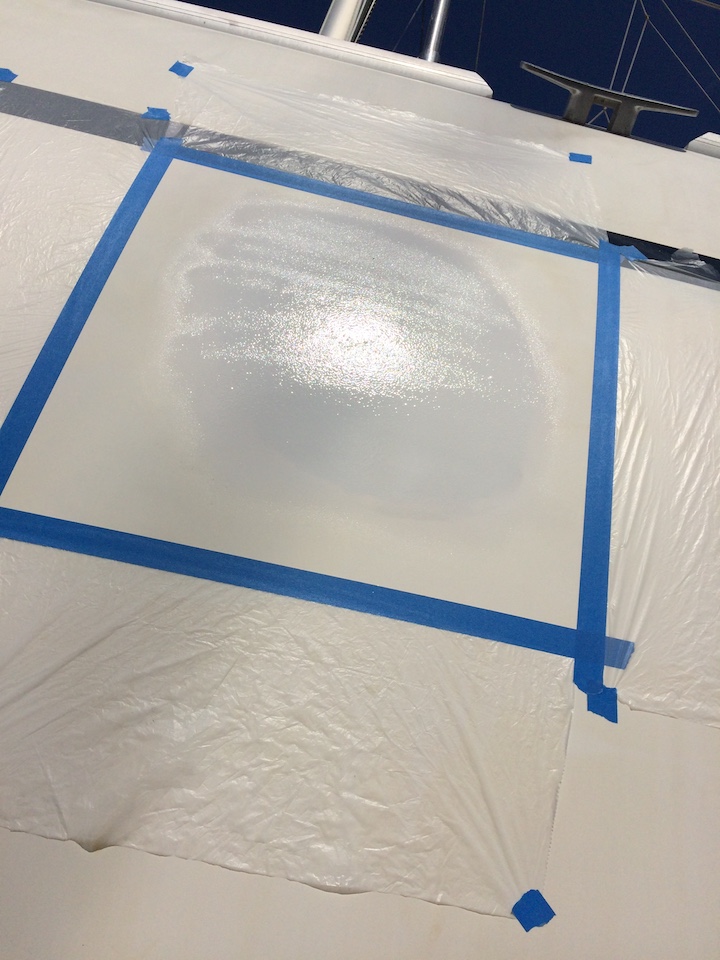
| Ready for Sanding |
Careful sanding of the gelcoat was required to remove the orange peel surface effect without getting too thin. We started with 220 grit on a pad sander to take off the high spots. Then it was time to remove the blue tape and plastic sheet and start wet sanding with paper around a wood block. We started at 320 and progressed to 600, then 1200. Patience is required. If you go too fast or too hard, the gelcoat gets thin and you can see the darker filler compound below. Feather it out to the surrounding gelcoat. Then we finished with a compounding wax and a buffer.
The entire process took us about a week, mostly due to waiting for the epoxy to cure. We also had to be careful of warm sun causing the epoxy and gelcoat to cure too quickly.
I didn’t have a final picture. But when I went to get one, I couldn’t find the exact spot. It must be a good repair if I can’t easily find it while looking from the deck.
No comments:
Post a Comment